Do you have a piece of decor sitting in a box or closet not being used because it’s the wrong colour or style? Check out today’s post which is all about an amazing DIY lantern makeover with paint.

Thanks for joining me today as I show how to transform an unused decor piece with an amazing DIY lantern makeover using paint. The same techniques can be applied to rejuvenate any old (or new in my case) decor piece that you may have in your home. Even an “out of style” piece can look so much better once painted in a fresh new colour.

Here’s the story of my lanterns. About seven years ago, I won a whole outdoor deck set at a home trade show. Along with a BBQ and patio furniture, I received two large outdoor lanterns. They came with battery operated candles inside and were very nice. I just didn’t like the shiny silver metal finish on them. The silver lanterns looked more modern glam style and didn’t go well with my decor and style. So I tucked them away in their boxes in my garage and have mostly forgotten about them.
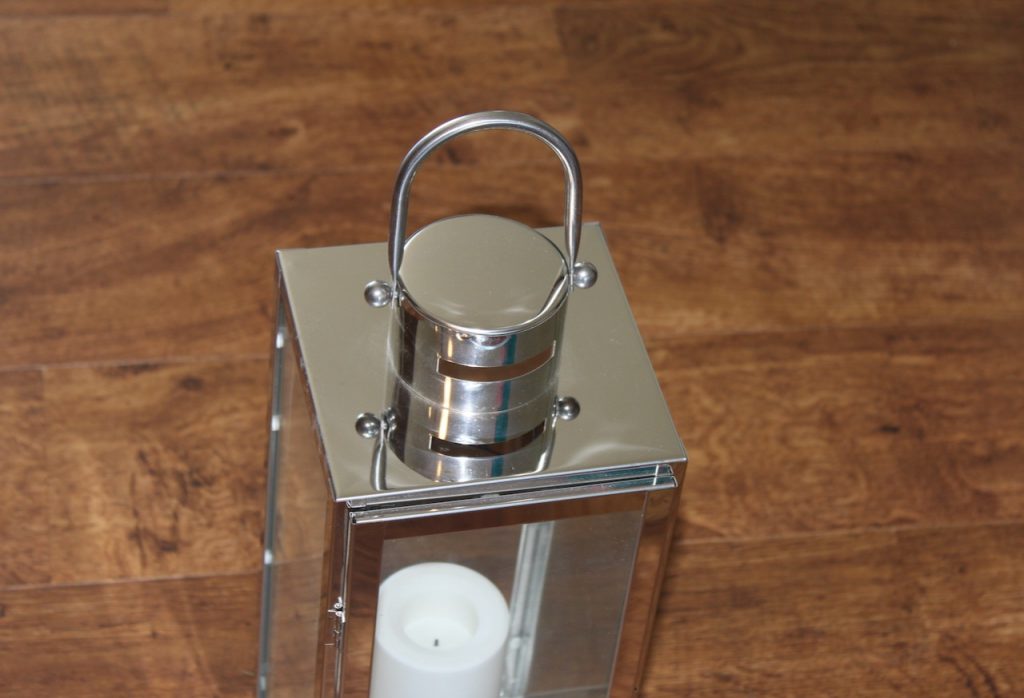
Fast forward now to last week when I was doing my small front porch makeover. https://behomeinspired.com/2022/06/07/decorating-a-small-front-porch-for-summer/. While working on this project I really needed a couple more decor pieces to add to my porch display. I love the look of black lanterns sitting on an outdoor porch and really wished I had some. I don’t live close to any retail stores and wanted the porch makeover to be budget friendly. Then I remembered the ugly silver lanterns I had just sitting in the garage and decided to go dig them out to see how they looked. The size and shape of them were perfect sitting on the front steps and I decided to DIY a makeover using black paint.
Supplies You Need
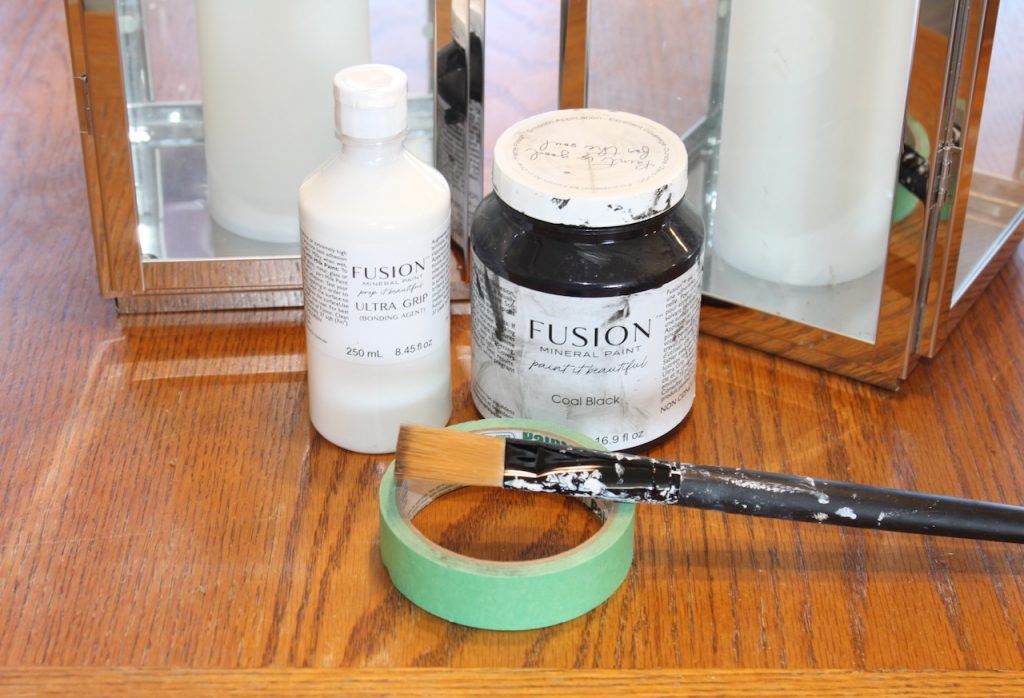
- Black Paint
- Fusion Ultra Grip or a type of primer for shiny surfaces
- Paint Brush
- Green painter’s tape
- Cleaning rag
- Drop cloth or newspaper
I wanted my lanterns to be painted black and I needed to use what black paint I had on hand. This happened to be black Fusion mineral paint in the colour coal. I’ve been using this non-toxic paint a lot on my DIY projects and am loving it. I talk about Fusion mineral paint a lot more in this post. https://behomeinspired.com/2022/04/21/diy-patio-cushion-makeover-using-paint/. Another option would be to use a black matte or glossy spray paint for shiny metal surfaces. I didn’t have any and our local hardware was out too.
Here are the supplies needed for this project. Ultra-grip primer used to prime smooth, shiny surfaces. A paint brush to apply the ultra grip and paint. (I used a one inch artist brush). Green painter’s tape is used to cover the edge of the glass. Lastly, get a cleaning rag, and a drop cloth or newspaper to cover the surface where you’re painting.

Clean off your Decor Piece
Use the slightly damp cleaning rag to clean off the lanterns, removing any dust or particles. The paint sticks much better when a surface is clean. Having the painting surface clean will help to get a finish that will look smoother too.

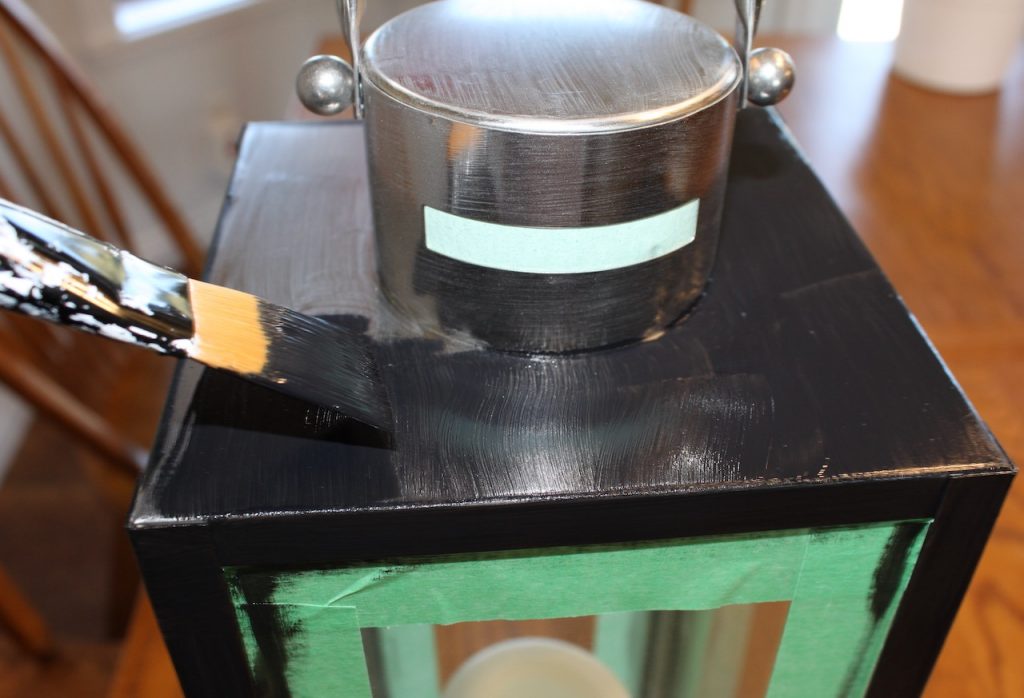
Taping the Lantern Glass
Using green painter’s tape, line the edges of the glass next to where you will be painting. This took some time doing all four sides with each lantern but it was worth the time. This prevents the paint from getting all over the glass and makes it so much easier to paint along the tiny edges beside the glass.
Set up the Work Surface
Clean up is always easier if you lay down a drop cloth or some newspaper on the surface where you are painting. I often work on my kitchen table, so I always want to make sure to protect it. Clean up is much faster and easier too. One of the reasons I love using the Fusion mineral paint is because there are no nasty paint smells or chemicals to worry about. So I can work right in the kitchen.
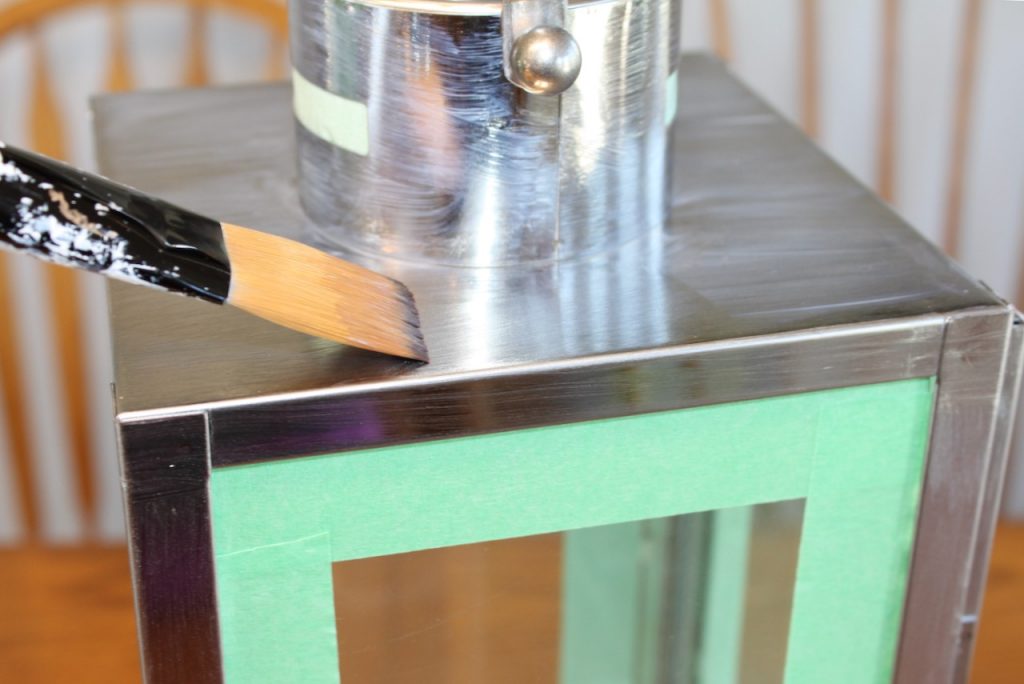
Getting Paint to Adhere on a Shiny Surface
The surface of the metal lanterns were very smooth and shiny. Without being able to sand it, I needed to make sure the paint would stick to the surface of it. This is why I needed the Fusion Ultra grip to help give the paint better adhesion. Here is more info on the ultra grip. https://fusionmineralpaint.com/ultra-grip-for-those-really-tricky-surfaces/. If using a spray paint that is specifically designed to stick on metal surfaces, you may not need this step.
I painted a coat of the ultra grip on all the silver surfaces of the lantern that I would be painting black. The ultra grip dries clear and I let it dry for a few hours.

Painting
The next step is to paint the lanterns with the black paint. I did two coats of paint, letting them dry completely in between coats. If you are using spray paint, do several coats of paint and let them dry well in between coats.

Finishing Up the Project
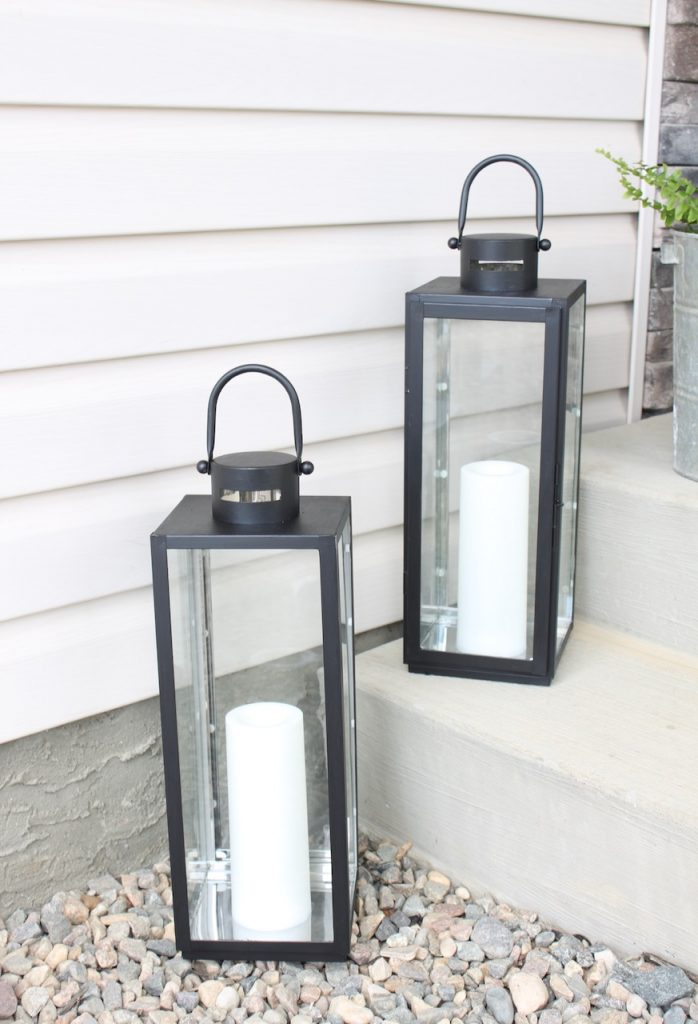
Once the paint is all dry, it’s time to remove all the green tape from the glass panels. The tape did a pretty good job of keeping the black paint off of the glass. I cleaned the glass with a window cloth and installed batteries to candles in the lanterns.

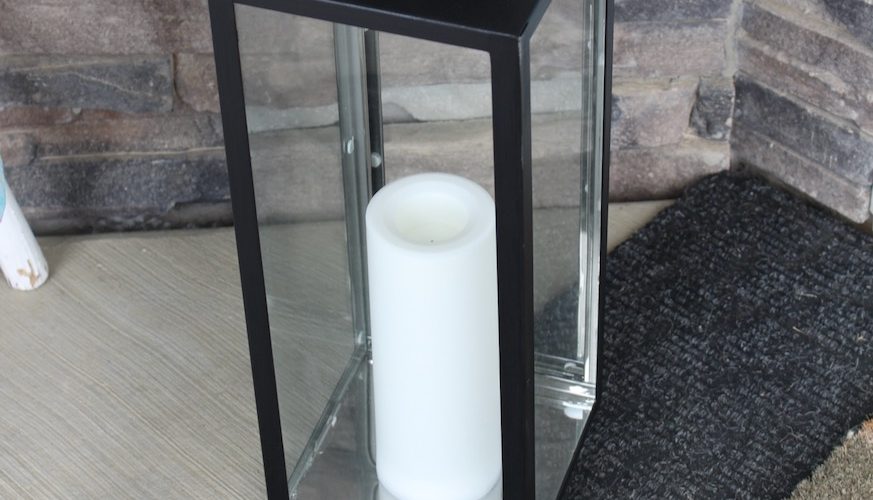
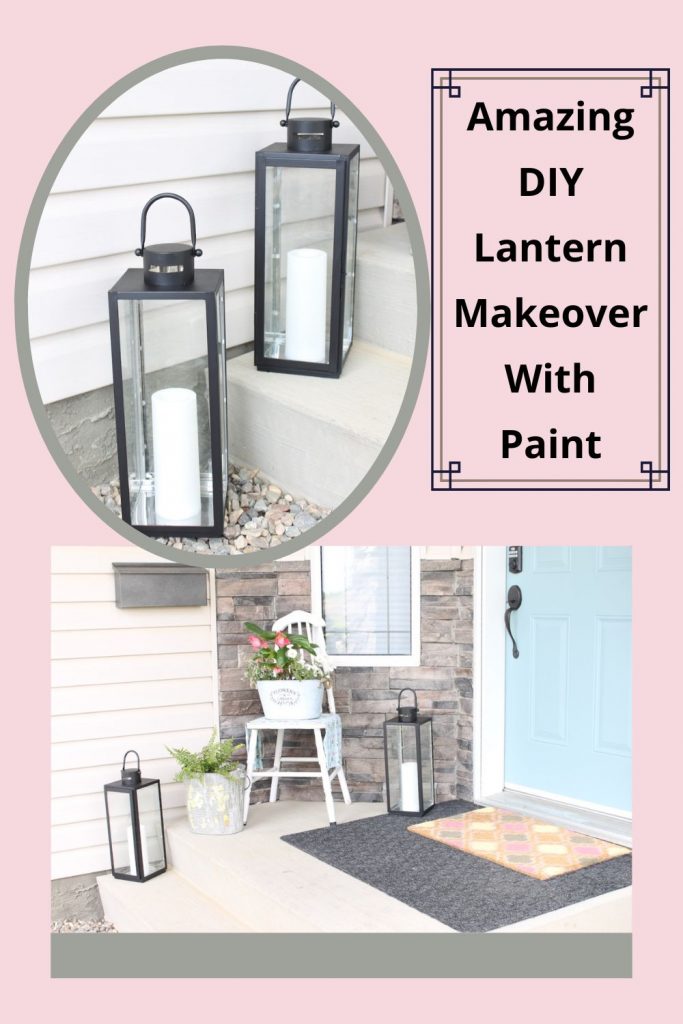
Amazing DIY Lantern Makeover
The transformation of these lanterns was amazing! Now I had two beautiful black lanterns to set up and style on my front porch. With just a little time and work I was able to makeover a decor piece that I can now enjoy in my home.
I want to challenge you to have a look around your home for some decor pieces that you no longer love or use. Is there a way to do an amazing DIY makeover on them, like I was able to do for my lantern makeover using paint?
Have a wonderful week and happy DIY’ing!
XO Rachel


How cute!! These turned out great!
These came out so cute! I have a metal lantern that I have been wanting to paint, it is red which is cute for Christmas, but I would like to use it all year round. Love how the black turned out!
What a great idea! I love how it turned out – the black looks so much better! Thanks for sharing! 🥰